
Do you have an account on Discord but do not know how to set it up? Follow all the steps mentioned below to set your account on discord.
How To Create And Setup The Account On Discord?
You must first register for a Discord account and set it up before you can use the service. With this account, you may use Discord in your chosen web browser and start looking for communities for your favorite interests immediately. Then, you can choose according to your desire to be told when something happens in certain areas, so you are always in the know. Despite the fact that this procedure is rather simple, this article will walk you through it so you can get started right away.
Joining one of the many tech-focused Discord servers can actually help you get the most out of your VPS cloud server experience.
Registration for a Discord Account
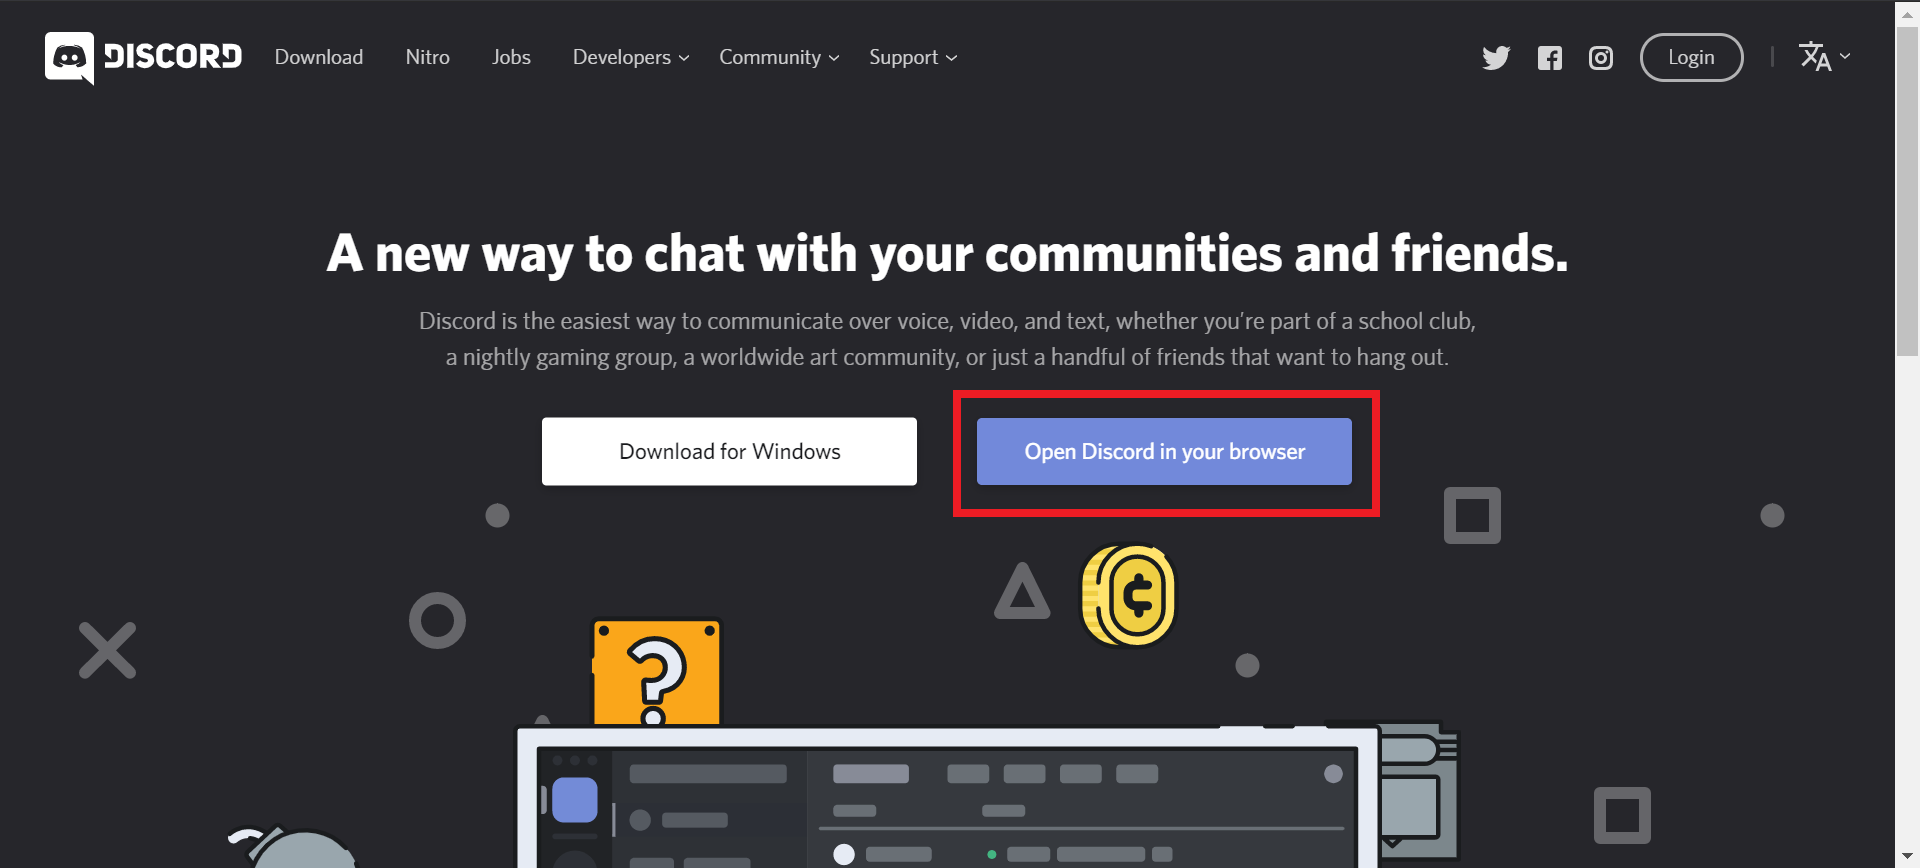
1. Please visit discordapp.com.
2. Click the Discord browser button.
3. Click the arrow after entering the desired username.
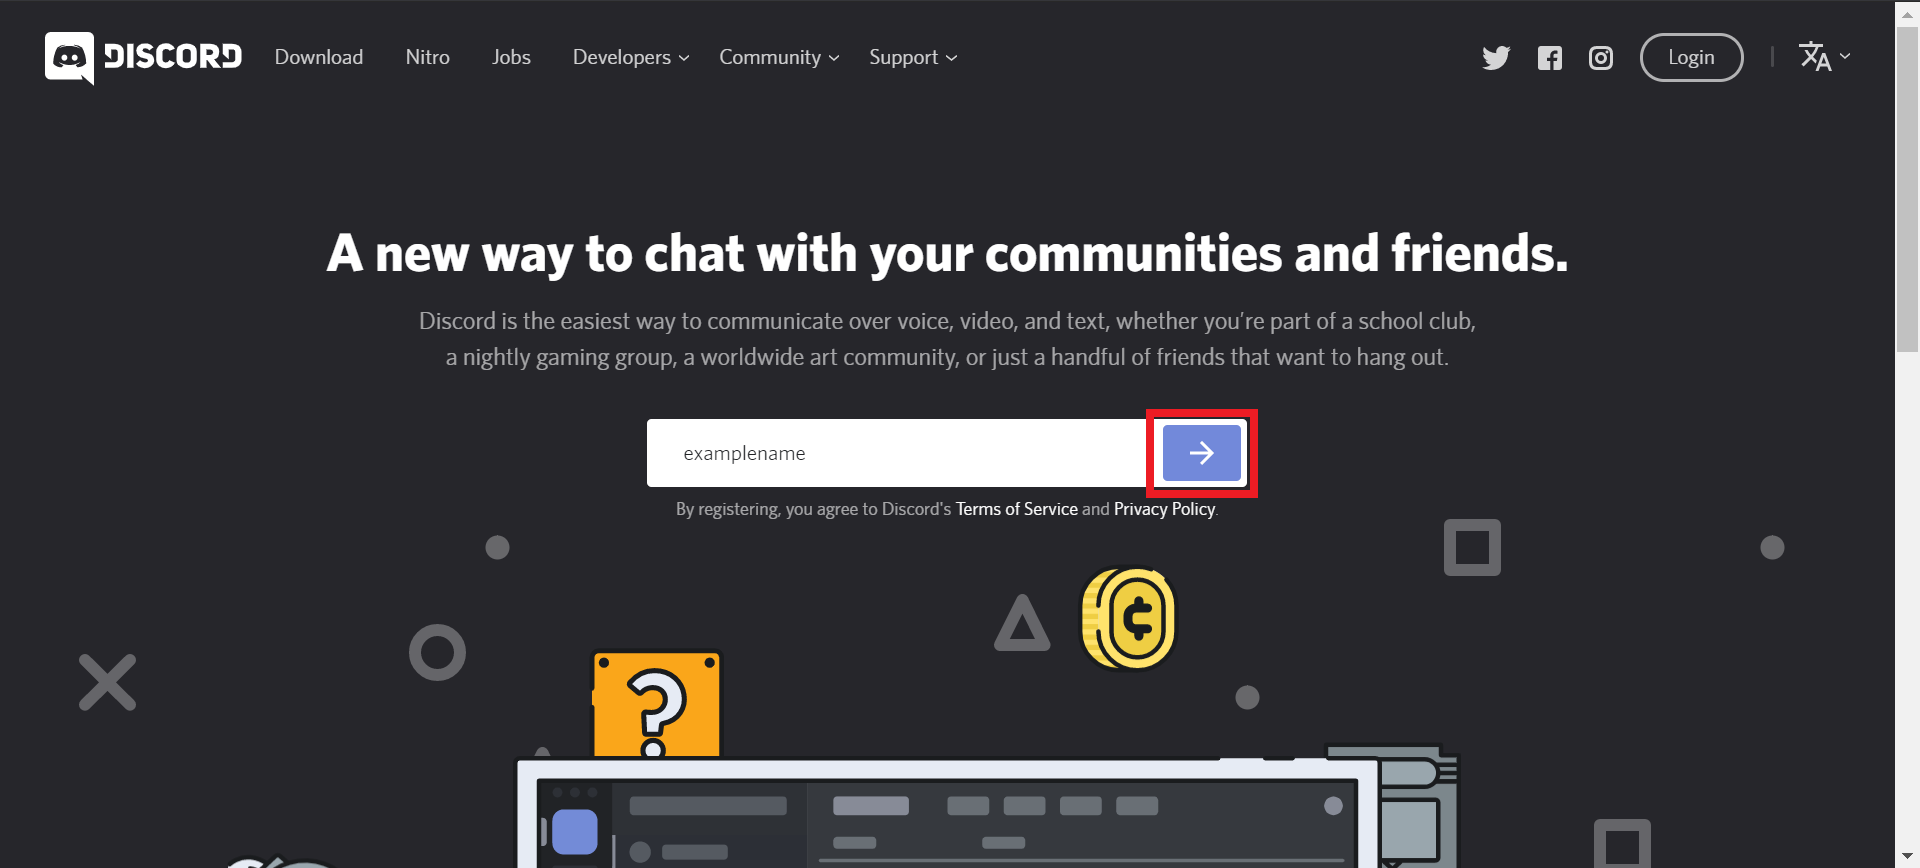
4. Fill out the captcha as instructed.
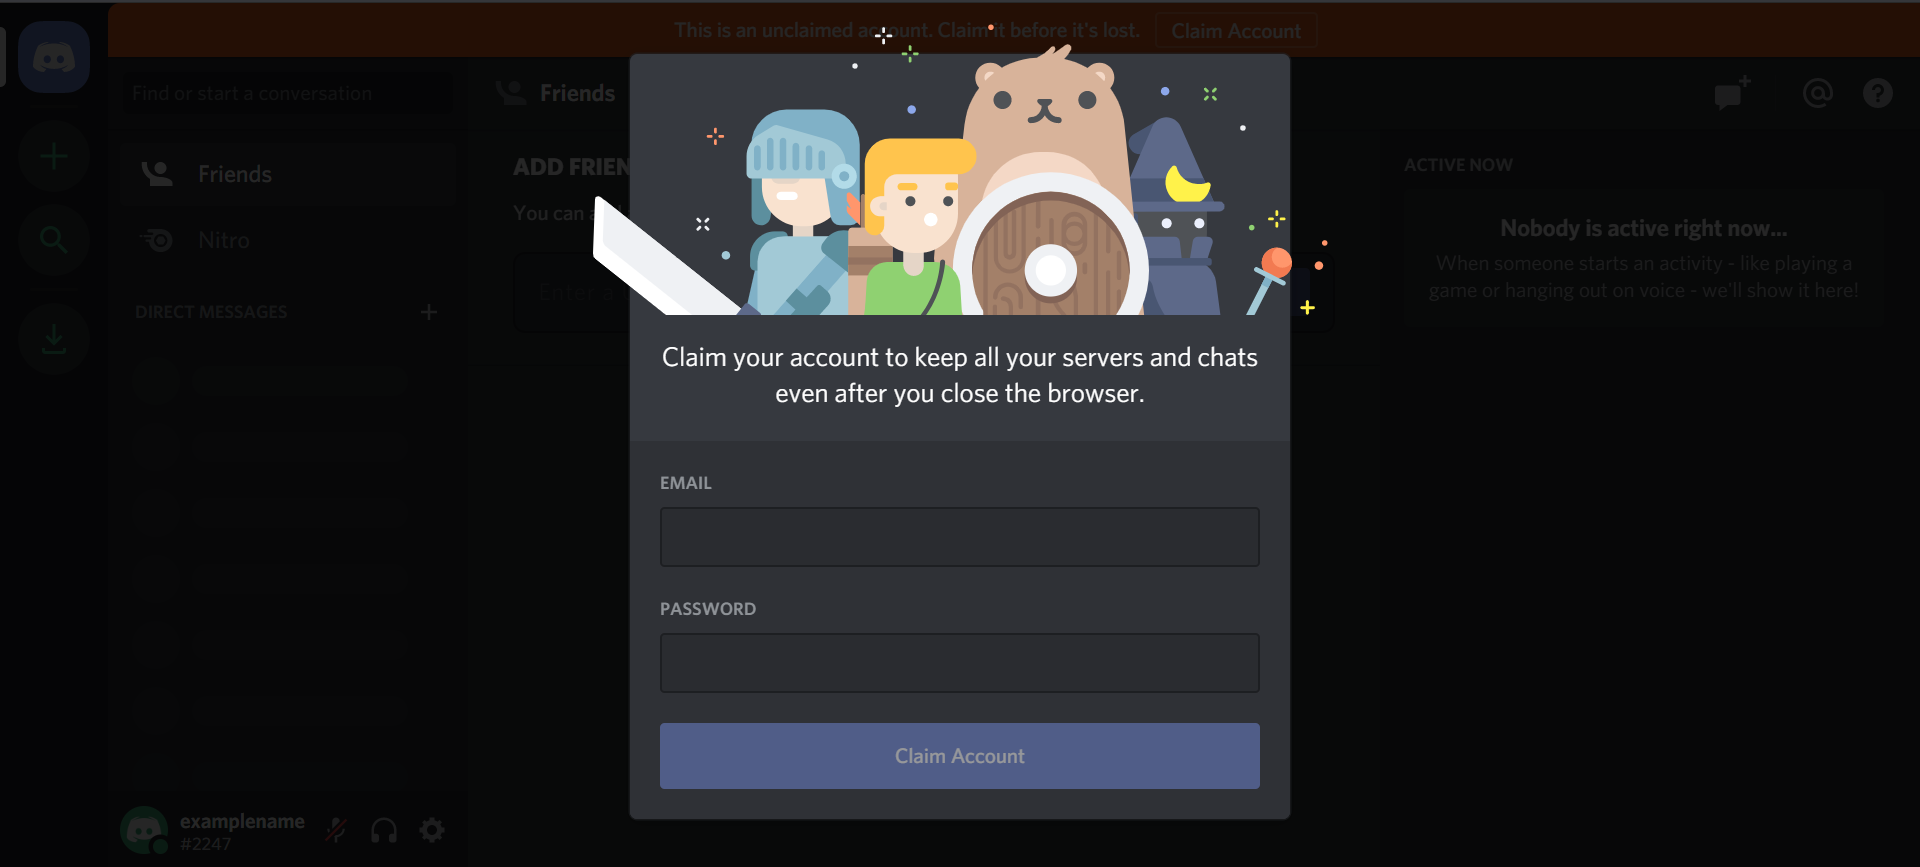
5. In a popup, you will be given the option to either finish creating your account or Get Started with creating a new server. Choose Skip.
6. The next step is to claim and protect your Discord account by entering your email address and password. When you’re finished, click Claim Account.
7. Click X to dismiss the box that offers a link to download the Discord desktop program for the time being.
8. Log into your email account to find the confirmation email and finish the account creation procedure. To validate your brand-new Discord account, click the link in the email.
You have successfully made an account on Discord!
Managing the Friends List in Discord
It is possible to create a contact list or friends list on Discord even though most users communicate via Discord servers. You can call or video call other users on this list and send them direct messages.
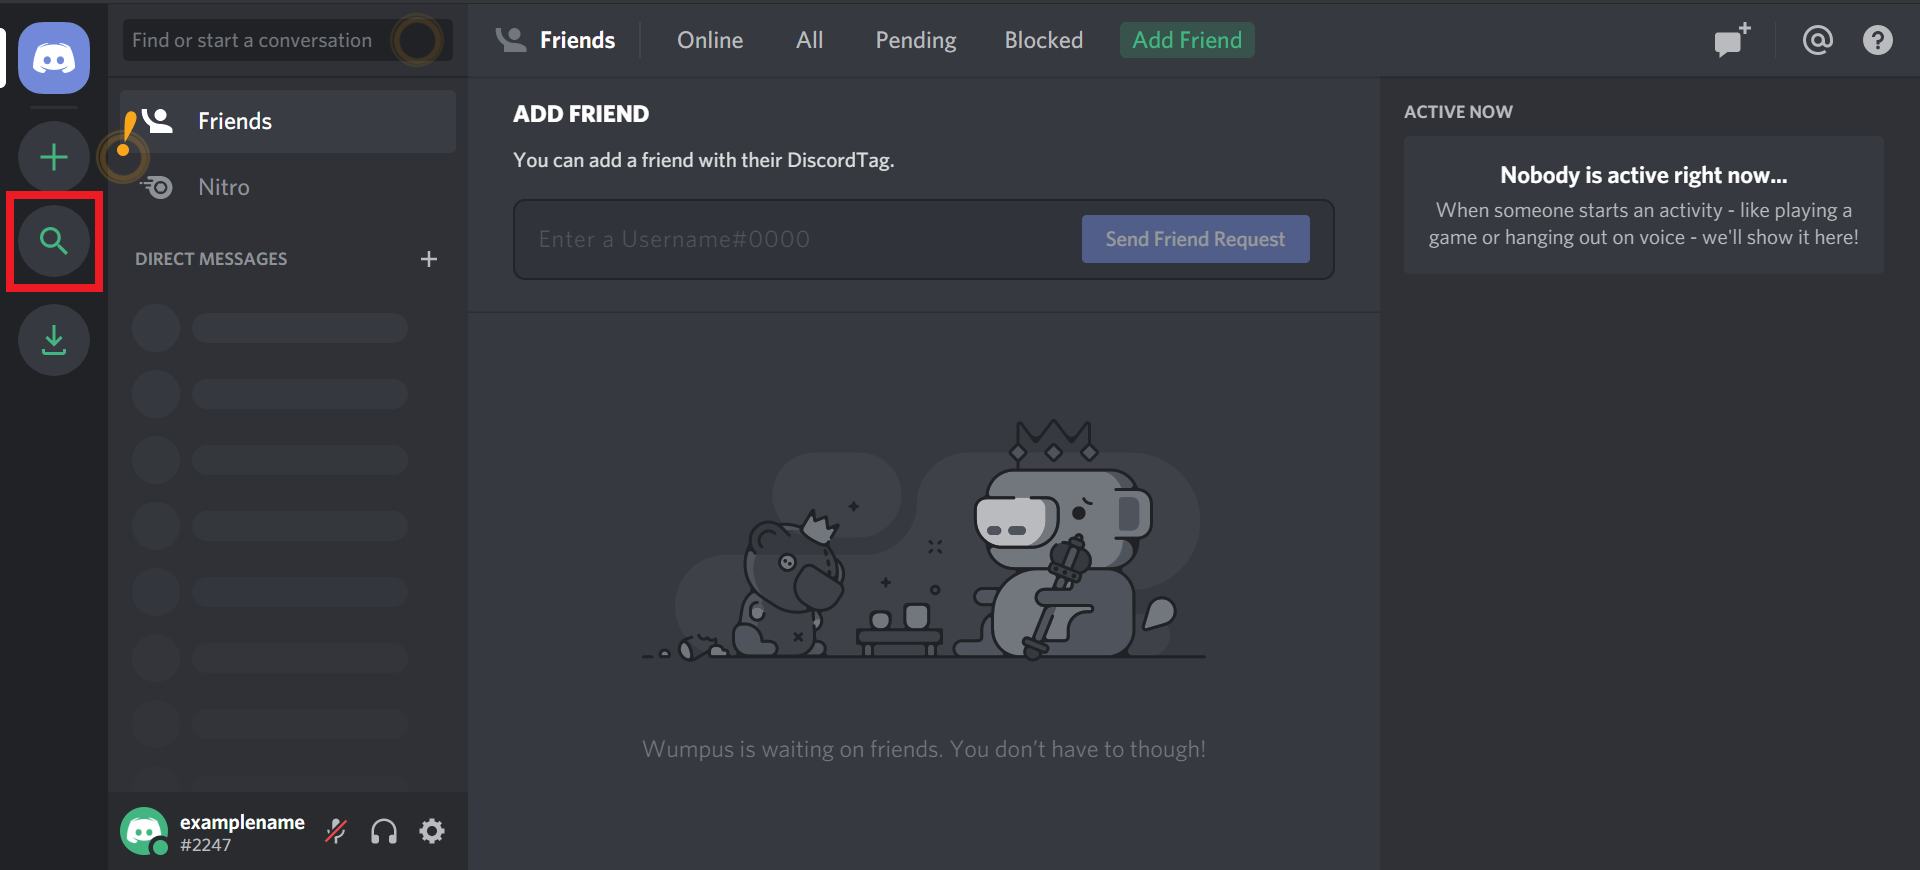
1. Click the Add Buddy button at the top of the Discord home page to add a friend.
Your username will then need to be entered. The friend you want to add will have this username as their DiscordTag.
2. The DiscordTag, which is displayed in the bottom left corner of the Discord interface, is a username followed by the hash symbol # and a string of random digits.
Clicking on the user’s profile image will also reveal the DiscordTag for the person you want to add as a buddy. You will then be directed to their profile page, where you can see the DiscordTag. You can also send a friend request directly by clicking the Send Friend Request button on the profile page.
3. Click Send Friend Request after entering the DiscordTag you want to add.
4. The other user will appear on your friends list once they’ve accepted your friend request.
You have successfully learned how to add friends in Discord!
A Discord Server Membership
You will need to locate a server that aligns with your interests because Discord communities are stored on different servers. You must join the community’s server after you have found one you want to be a member of. Below, we shall describe this procedure:
- To begin looking for servers, click the magnifying glass icon.
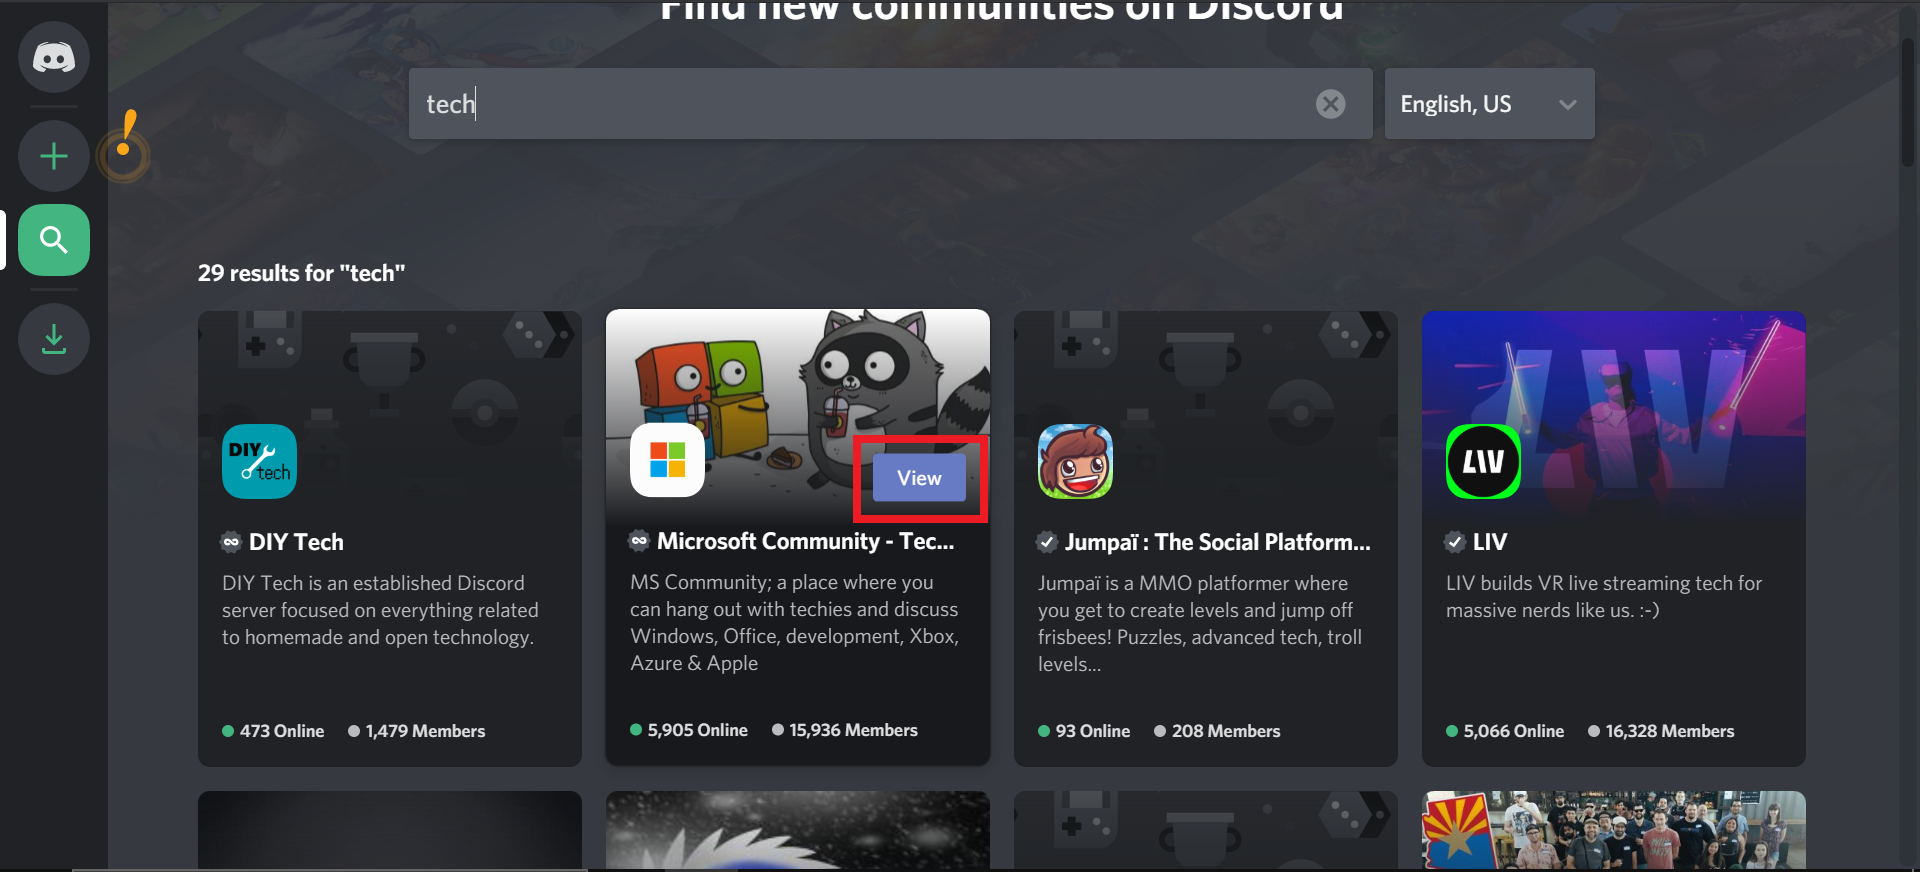
2. Enter the search term in the text area on the following page and press the Enter key. In this case, the search term “tech” is used to find communities that are focused on technology.
3. Following that, a list of servers depending on your search parameters will be displayed by the search tool. To view the server homepage for any server that piques your interest, click View.
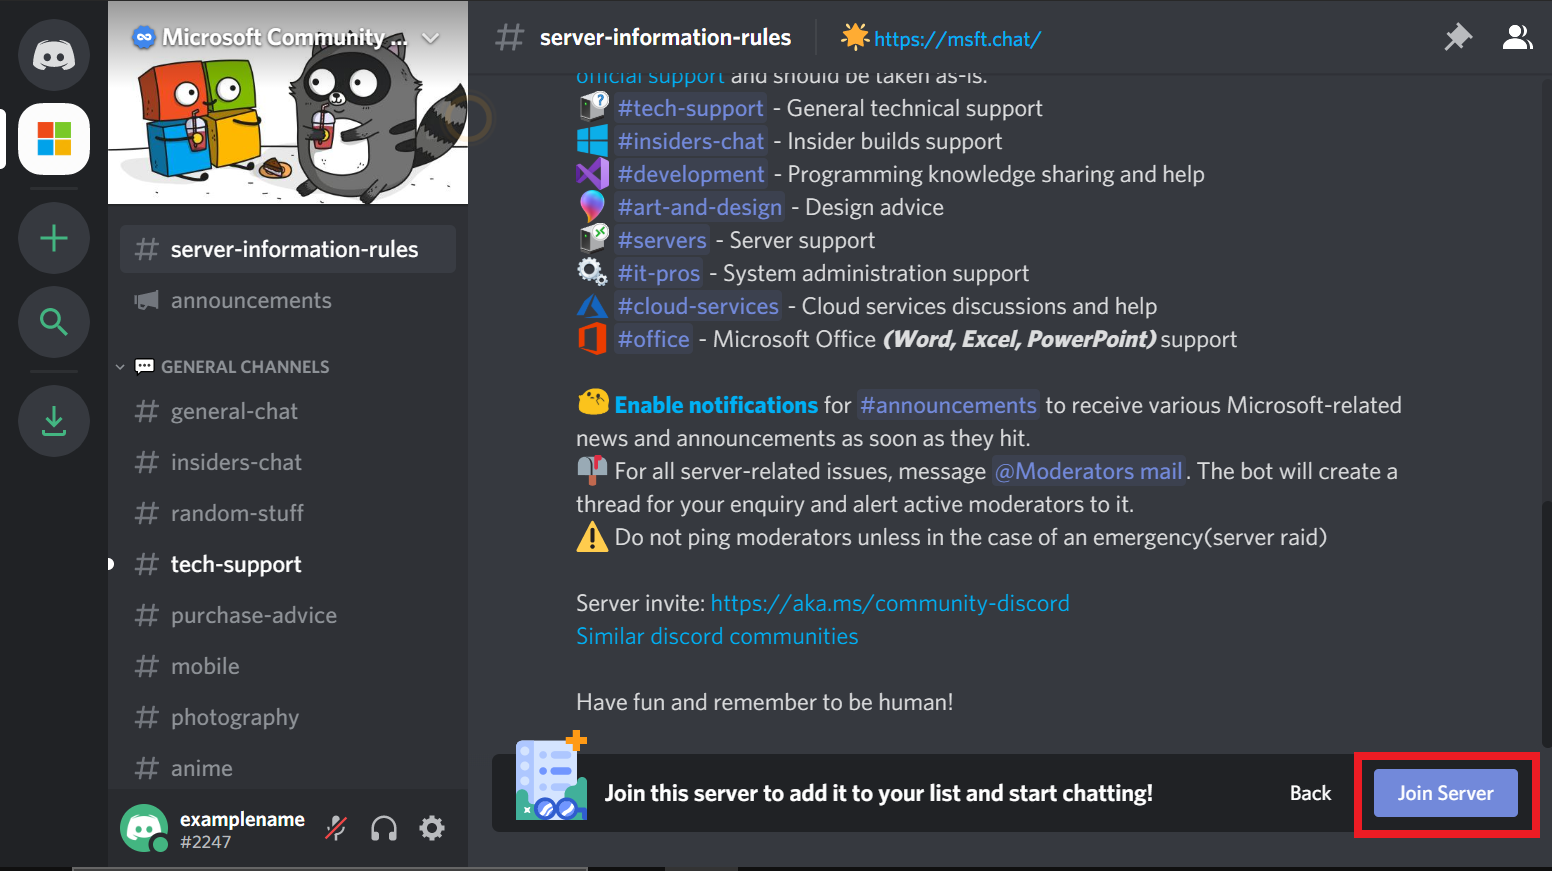
4. Click Join Server at the bottom of the server homepage once you’ve located a server you wish to join.
5. On your Discord homepage’s left side, a symbol for the new server will now be visible for convenient access.
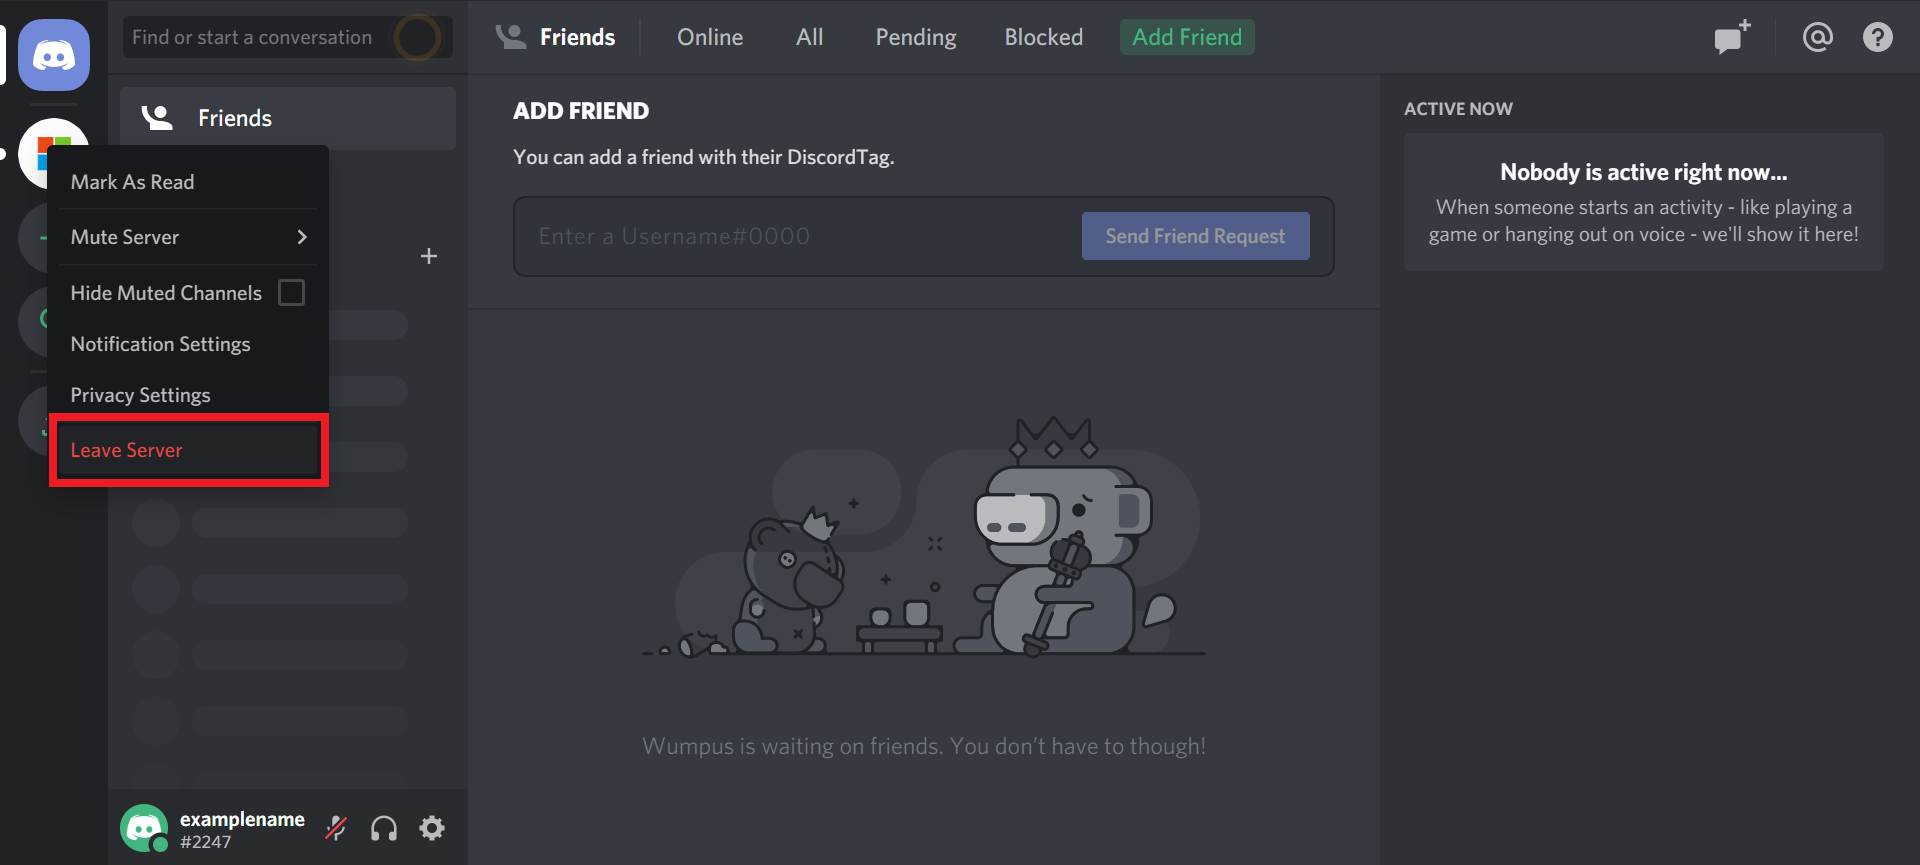
6. You can exit the server at any time by selecting Leave Server from the context menu when you right-click on the server icon. You will be asked to confirm this choice. To complete the process, click Leave Server once more.
You can add as many servers as you’d like to your Discord homepage by following these steps, providing you quick access to your favorite communities.
Modifying Notification Preferences
You might want to change the notification settings for the servers you’ve joined to make sure you never miss a minute. We will outline and clarify the procedure here because some of the alternatives might not be clear:
1. Click the right mouse button on the server icon you want to change.
2. Navigate to Notification Settings.
3. The first choice enables you to muffle the server as a whole. Whenever you choose this option, you can still get notified if your username is mentioned in a chat channel. This is helpful if you want to know when someone is trying to contact you but don’t want to be inundated with notifications.
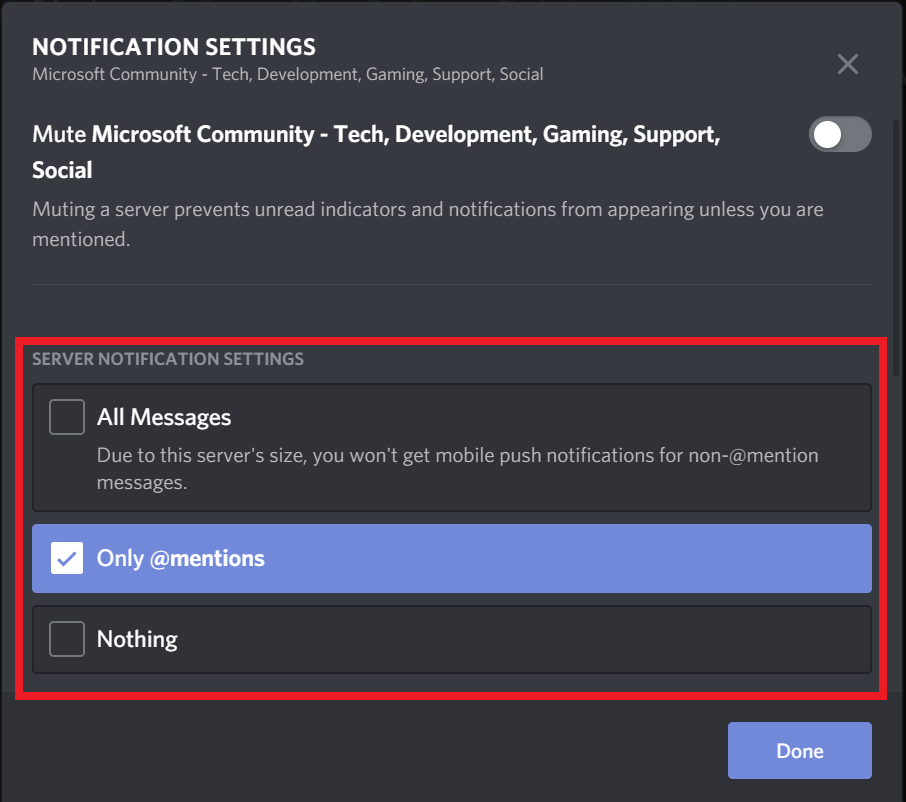
4. Choose one of the following choices from the Notification Settings menu:
Every time a message is sent in one of the chat channels you actually have access to on the server, you will be notified.
Only @ Messages: You’ll only receive a notification if someone mentions you with the @ sign before their name.
Nothing: This server won’t send you any notifications.
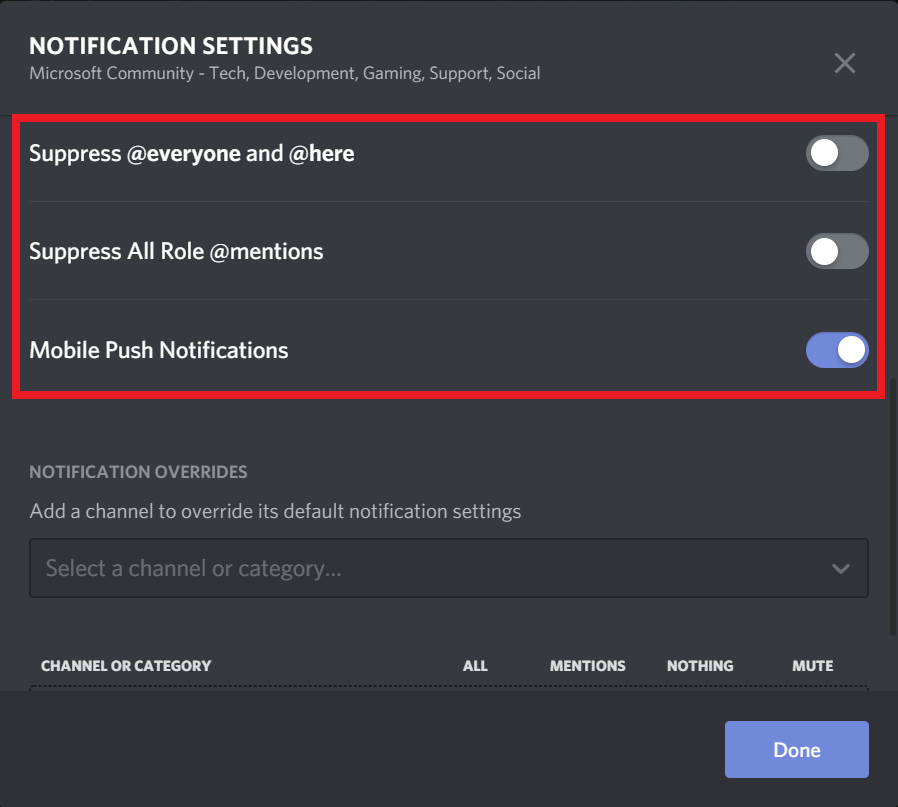
5. Three toggles can be found underneath those choices to further alter your notification preferences:
Put an end to @everyone and @here: Discord by default alerts all users on a server when the tags @everyone and @here are used. These notifications are turned off when this option is enabled.
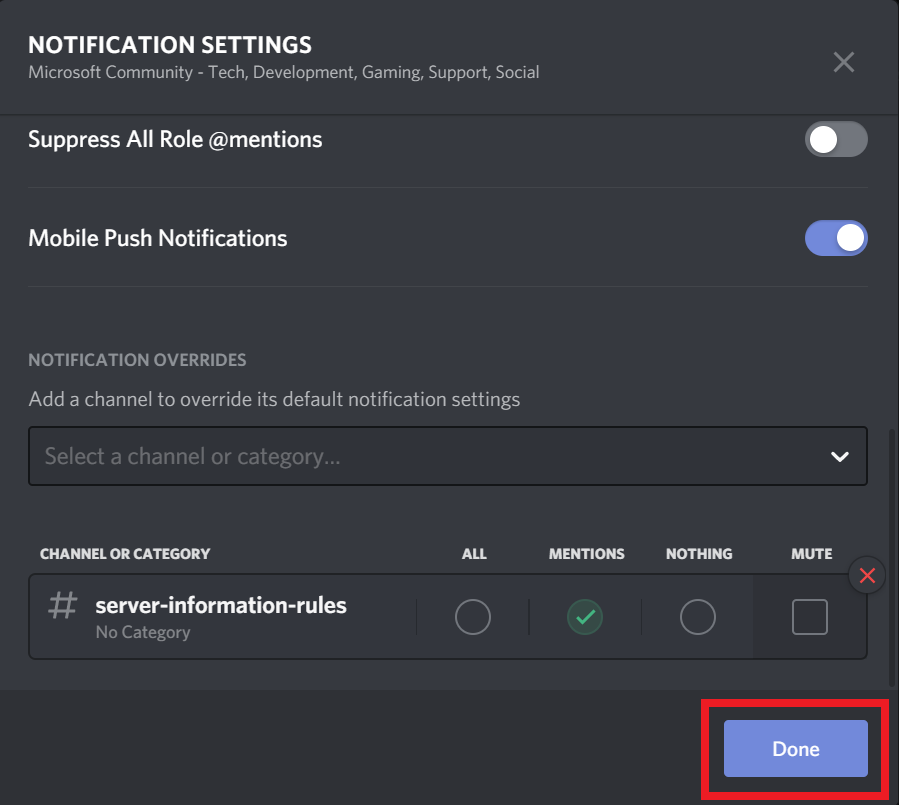
Suppress All Role @mentions: When the hashtag @UserRole is used in a chat channel, Discord automatically alerts all users who are assigned to that role on the server. These notifications are turned off when this option is enabled.
Push notifications for mobile devices: By default, Discord forwards all notifications to the email address connected to your account. These notifications are turned off when this option is disabled.
6. The ability to modify the default settings of certain channels rather than the server as a whole can be found at the bottom of the menu. To do this, you first select the channel you want to override from the drop-down menu by clicking on it, after which you tick the relevant bubble for the notification option you wish to modify. You can choose which chat channels to receive notifications from thanks to this feature, which is useful for servers with lots of chat channels.
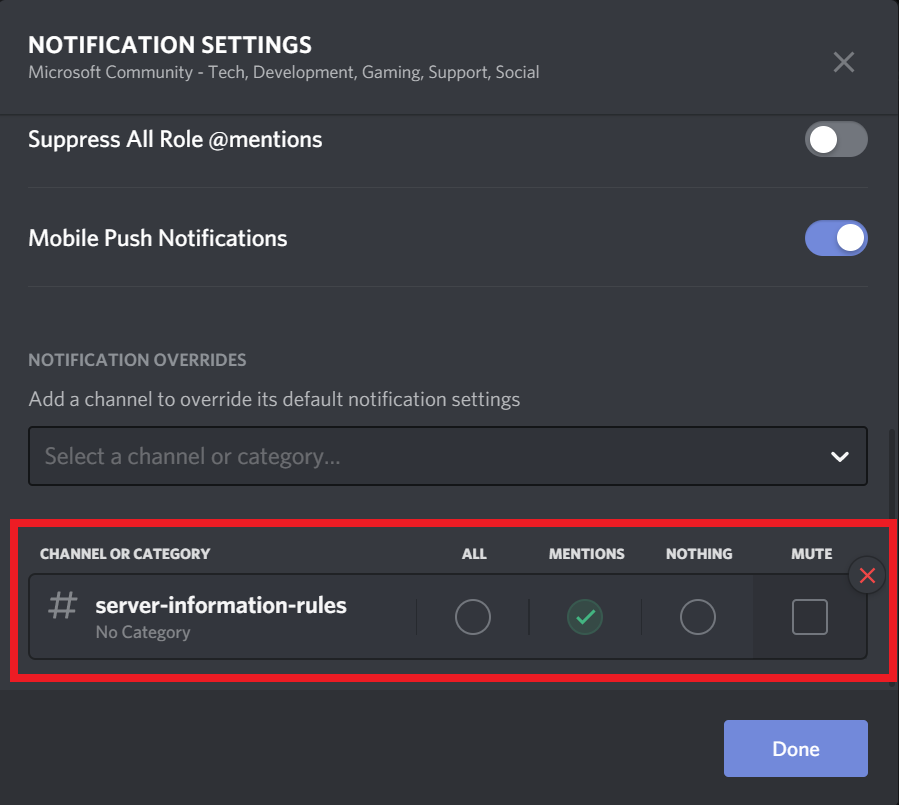
7. Click Done to save the changes after you are finished editing.